Tired of the template limitations or coding facilities in Wix? Or looking for better flexibility and customization features for your website? Switch to WordPress! But how?
Unfortunately, there is no one-click solution to migrate your Wix account to WordPress. However, there are migrating plugins using which you can migrate large websites in minutes. But these plugins are not free. So, if you don’t want to spend on plugins, there are manual options too. It will save you dollars but kill your time, especially when you have a big website.
In this guide, we have brought to you three methods using which you can migrate from Wix to WordPress. But before that take a look to the benefits that you will get switching to WordPress-
Why Migrate From Wix to WordPress?
WordPress is the best content management system; this reason is strong enough to stand ahead of Wix. Yet, we are presenting some logical points for which you should migrate from Wix to WordPress-
- More options in choosing plugins and themes
With WordPress, you will get a wide range of themes and plugin options. You can get them both for free and paid premium versions. This gives you more flexibility and customization possibilities with WordPress.
- Ownership and Control
WordPress is self-hosted. That is, you can host it on your own server or choose any other hosting service. This gives you greater control over your website’s ownership and migration. But with Wix, you have to use their hosting services. This creates limitations in ownership and control.
- SEO Facilities
When it comes to search engine optimization of your content, WordPress wins the game. It is specially built for content management with built-in features for on-site visibility. Besides, you will get many plugins for WordPress SEO that will keep your website on track. Wix can’t beat these features of WordPress.
- Greater Scalability
WordPress is suitable for all types of websites. Whether you are a beginner or have a large website, no worries about scalability. But Wix supports small to medium websites. So, if you think long-term, switching from Wix to WordPress is undoubtedly the best decision.
- Coding Access
Wix doesn’t give you direct access to coding. For example- you can’t add your own HTML or CSS or code Python on Wix. But with WordPress, you can go for coding. Thus, it gives you greater customization facilities. So, if you want to get more flexibility, WordPress is your ultimate solution!
- Extensive Online Resource
WordPress allows you to get connected to a larger community and extensive online resources. So, if you face any issues and need support, helping hands is just one step ahead. Compared to this, the community forum of Wix is much smaller.
To learn more, check this- Choosing The Perfect Website Builder: Wix vs WordPress.
Migration From Wix To WordPress – A Complete Guide
We have divided the migration process into three parts- pre-migration, migration, and post-migration. Following the steps discussed in these three parts, you can effectively switch your Wix account to WordPress.
Pre Migration
Before migrating your Wix account to WordPress, you need to set up the platform. For this, you will require hosting, domain, and WordPress installation. Below you have added all the processes for your convenience-
- Hosting Purchase

The first step in migrating to WordPress is finding a suitable hosting service. In this case, choose services that provide WordPress-specialized hosting. This will provide you flexibility in using WordPress plugins and themes. Besides, you will also get SEO features that will help your content get better reach.
However, choosing the best WordPress hosting services gives priority to speed, security, and migration facilities. Considering these factors, we suggest you choose SiteGround, A2 Hosting, or Kinsta. For an extensive guide on choosing hosting services for WordPress, check this article- 10 Best WordPress Hosting Providers.
- Domain Setup

As your Wix account is still live, you must create a temporary WordPress domain. After completing your migration process, you can point the Wix domain to the WordPress domain. Now, different hosting services will offer you a free domain option when it comes to domain names.
But we suggest you avoid free domain offerings of hosting services. This is because they don’t give you full control, which is the main reason for switching your Wix account. Instead, purchase domain registration plans from GoDaddy or Namecheap.
For temporary domain names, you may not need to purchase a plan. Most of the domain hosting services provide a subdomain matching your user account name. You can also create a subdomain in the control panel of your hosting; for example- https://wordpress.example.com/. Once you are done with setting the domain name, add a DNS record in the domains section of your Wix account.
- Install WordPress
Getting WordPress-friendly hosting, you will get one-click installation features. With this, you can quickly install WordPress following the instructions. For example- if you have Siteground hosting, you will find WordPress popping up for setup options once you have signed in. Simply clicking on these options, you can have your WordPress ready.
However, there are manual options too. You can simply go to the official website of WordPress and install it to your hosting. After confirming your installation visit the temporary domain to ensure you find the default theme.
NB: Skip this step if your hosting has WordPress Installation by default.
- Changing Permalink’s Settings
You need to change the permalink structure of your site from the WordPress dashboard for search engine optimization. For that, go to the control panel of your hosting; for example SiteGround. Logging into your SiteGround account, click to- Proceed to Customer Area →My Accounts tab →Go to Admin Panel.
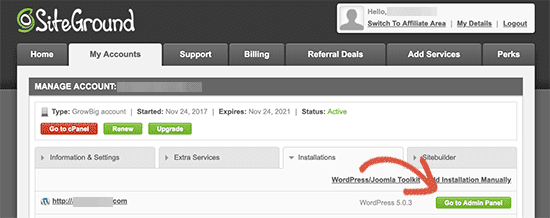
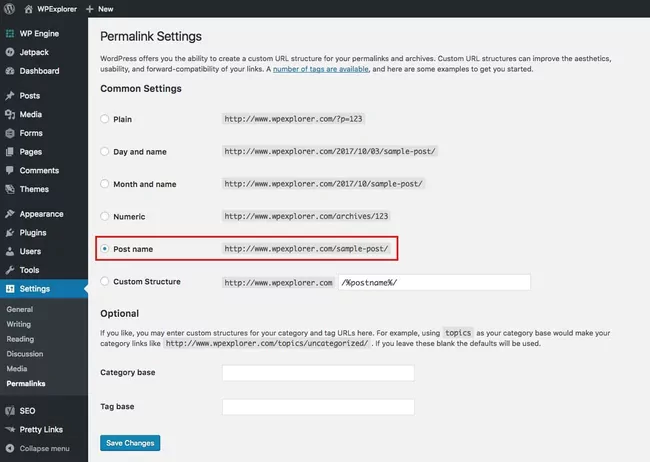
You will be led to the dashboard of your WordPress account. Click on the setting options; go to permalink settings and choose page name. Thus all your permalinks structures will be matched to the existing Wix account.
Migration Process
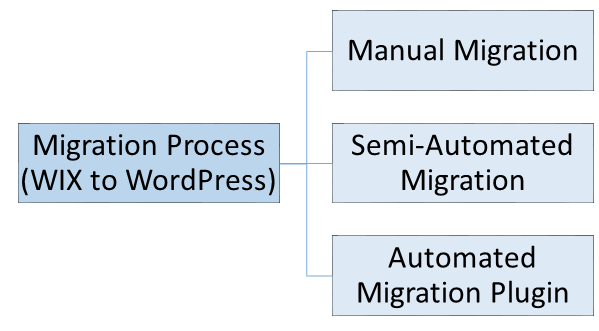
After setting up your WordPress, it’s time for the final stem. That is, migrating or importing the content from Wix to WordPress. For this, you can follow three processes – manual migration, semi-automated migration, or automated migration using plugins. Below we have added the detailed process for all three ways. You can choose the one that you find convenient-
Manual Migration
Manual migration is a copy-paste migration process. For this, you won’t need any technical knowledge. Though this process is simple but can be very time-consuming. Besides, you may need to reformat the copied contents.
So, if you have large websites with bulk content, we suggest you avoid this method. However, for small websites or fresh accounts on Wix, you can go for the below manual migration steps-
Step-1: Setting Up WordPress Posts and Pages
Before the manual (copy/paste) step, we suggest you set all the posts and pages ahead. By doing this, you will not have to fix each of the pages individually while importing. This will save you a lot of time.
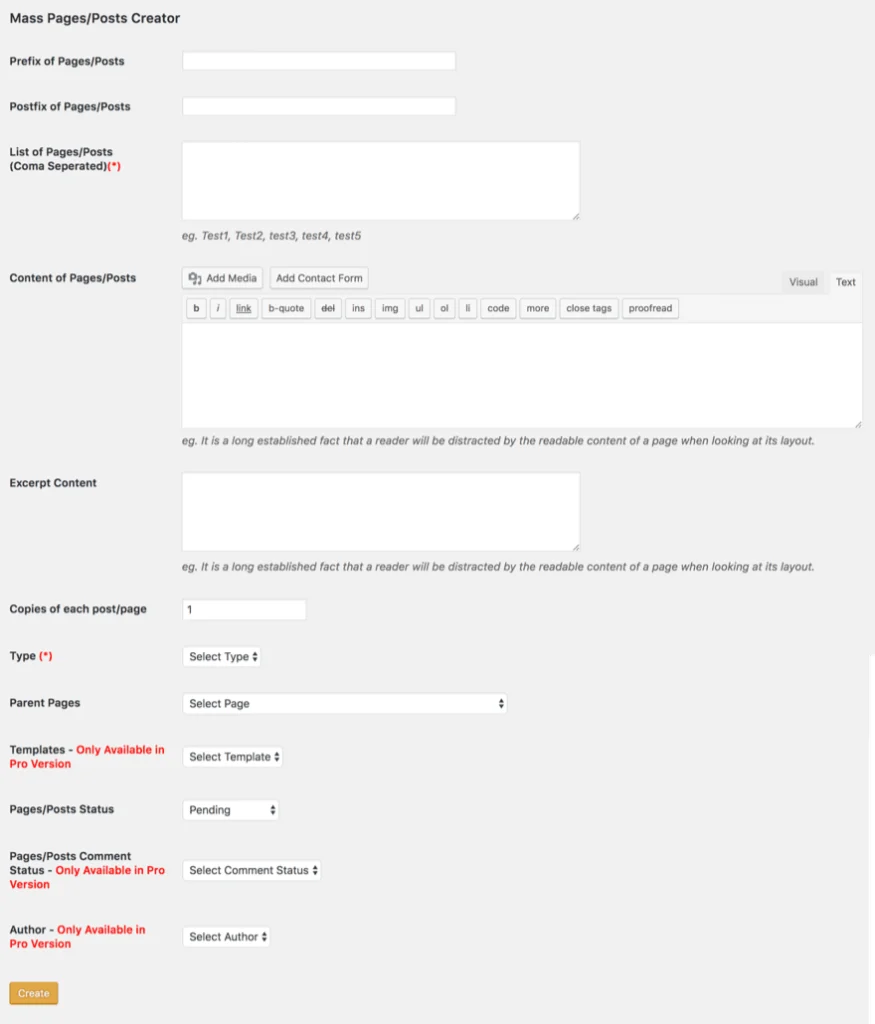
Go to the WordPress Admin Panel and select Add New, and check if all the URLs slugs match the Wix ones. You can automate this page creation process using plugins like- Mass Pages/Posts Creator plugin.
- Install & activate the plugin and go to the setting option on the menu.
- In the List of Pages/Posts, type the name of the top-level pages or posts separated by a comma. You can also insert the title of the pages to create URL slugs.
- Fill the next segments as per the requirements; these include- placeholder text, excerpt, type (post/page), etc. However, with the pro version of the plugin, you can get more options like template, comment status, and author options.
- Now that you have set the format click Create to get numerous dummy pages.
NB: If adding the publishing dates is important, you need to do that manually.
Step-2: Copy-Paste Your Content From Wix To WordPress
In this step, you need to copy the contents from the Wix account and paste them to WordPress pages and posts. This applies to images too. You can also download the images to your computer and upload them to the WordPress image library.
If there is any interlinking within the contents, you have to fix those links too. Otherwise, this link will point back to your old Wix account, showing an error. To ignore such situations, change the links pointing to your WordPress site.
You can simply type it without a domain in case of using the same URL slug. For instance, as long as the page is clicked on wphex.com, the hyperlink https://wphex.com/wix-to-wordpress will lead to the same location as /wix-to-WordPress. Thus, you can keep all your interlinking active.
However, repeating this same process for each and every page of your website can be really tiring. For this, we suggest you choose any method from the below options.
However, repeating this same process for each and every page of your website can be really tiring. For this we suggest you choose any method from the below options.
Semi-Automated Migration
WordPress supports importing posts from different platforms including RSS feed. But it is only a semi-automated process as it automates only post import. You have to import the pages and images manually. The process is discussed below-
Step-1: Post Import Via Wix RSS Feed
To import the Wix post to WordPress, first you have to locate the RSS Feed. For this, type /feed.xml to the end of your URL. For example- if the site’s URL is www.wphex.com, type www.wphex.com/feed.xml and your RSS feed will appear on the screen.
Now click the right button of your page and select save as. Before saving it to your desktop, you must change the file extension to .xml. Next, go the WordPress dashboard and select
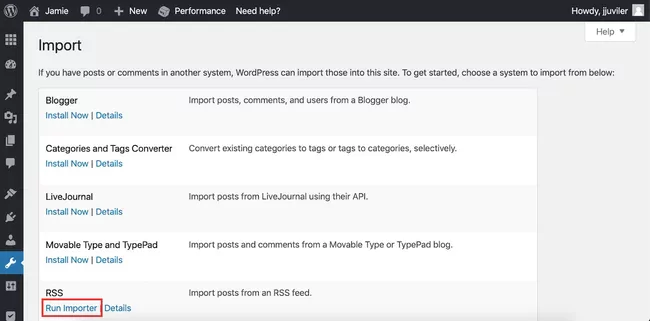
Tools → Import. Then scroll down to RSS importer and click on Run Importer.
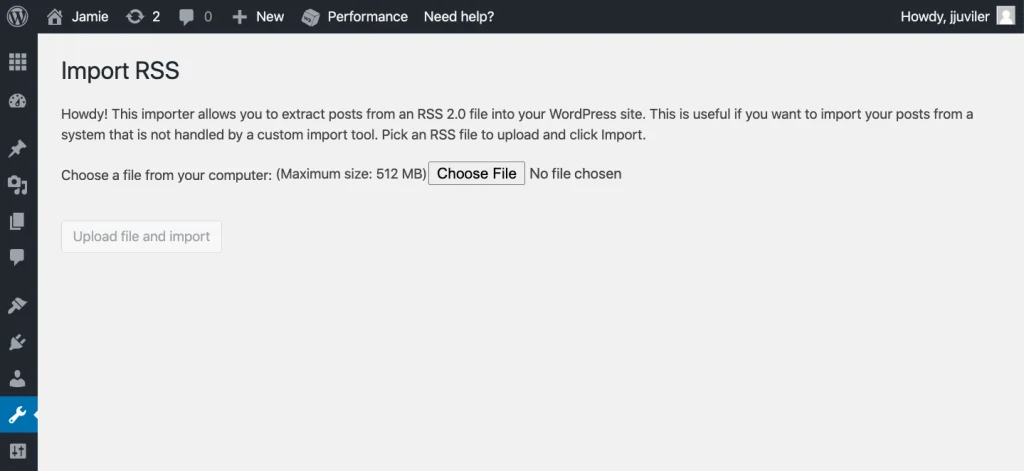
The next page that will appear on your screen will have a Choose File button. Click on it to select the saved file in your computer. Now, click on Upload file and Import button.
To ensure your file is imported successfully, go to the dashboard and select Posts → All Posts. You may find some formatting issues or junks that migrated from Wix. Clean them up and set your posts.
Step-2: Manual Page Transferring
With an RSS feed, you can only import the posts, not the pages. For this, you will have to add a Wix page manually to WordPress. But there’s nothing to worry about, as most of the websites have fewer pages.
This may include- the Home Page, About Us, Products, Resources, and Contact Us. You can quickly import them manually.
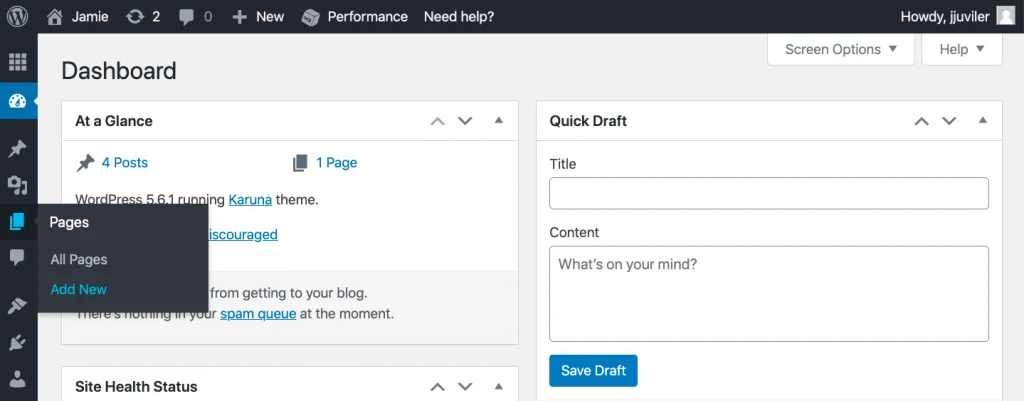
For this, copy the pages from your Wix account. Now, go to the WordPress dashboard and click- Pages → Add New and paste the copied pages. Import all the pages following this process.
Step-3: Image Importing
For image importing, you can go for the manual option or choose an image importing plugin. For manual importing, download images from your Wix account and save them to your computer. Then go to the WordPress dashboard and click Media → Add New. Repeat this process for each of the images.
For faster results, use the Import External Images plugin. It tracks the img tags and links to the images of your Wix pages and posts and copies the files to your WordPress website. Then it changes the link to point to the new image.
Using Automated Migration Plugin
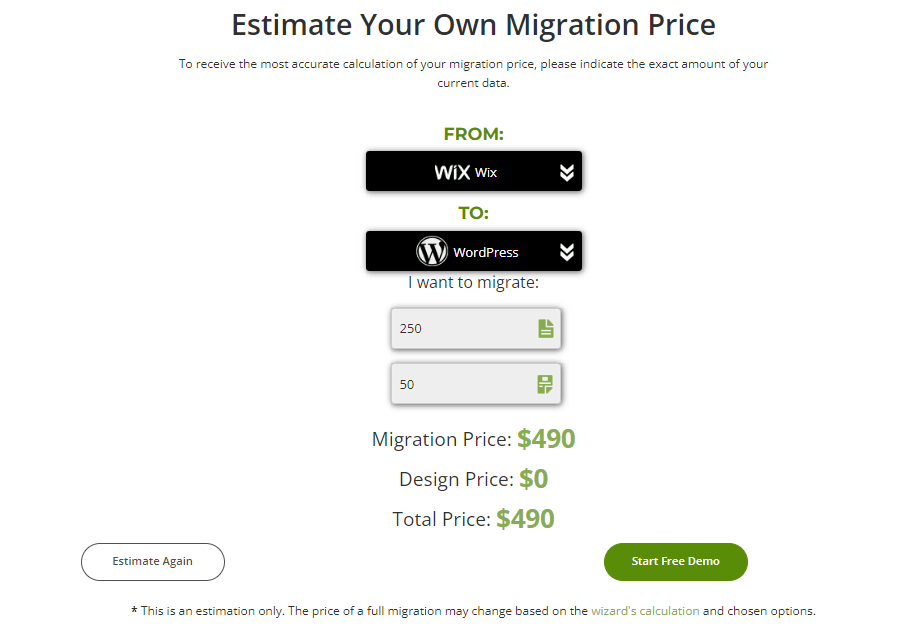
There are different types of migration plugins available for WordPress. But we suggest you to choose CMS2CMS. You can get the cost for your migration by simply imputing the number of pages & posts and taxonomy in their pricing page. For example- if you have 250 pages/posts and 50 tags, the migration price will be $490.
Step-1: Create CMS2CMS Account
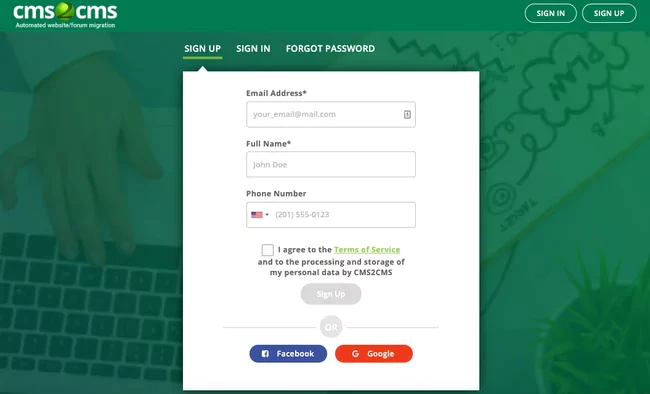
First, you need to install the CMS2CMS plugin and activate it. You will need to create an account to have access to the plugin. Here you will find an option to insert your email address, full name, and phone number.
You will also see a form where you will be required to input the current Wix account address and the site address of your new WordPress account. Given this information, they will offer you two choices for migration-
- Connector plugin
- Connector bridge file
Choose the plugin option, as the bridge file method needs to be installed via FTP, which may not be beginner friendly.
Step-2: Installing CMS2CMS Plugin
Once you click on the connect plugin downloading option, they will take you to the official site of CMS2CMS connector. Click on the download button, and it will save as a zip file.
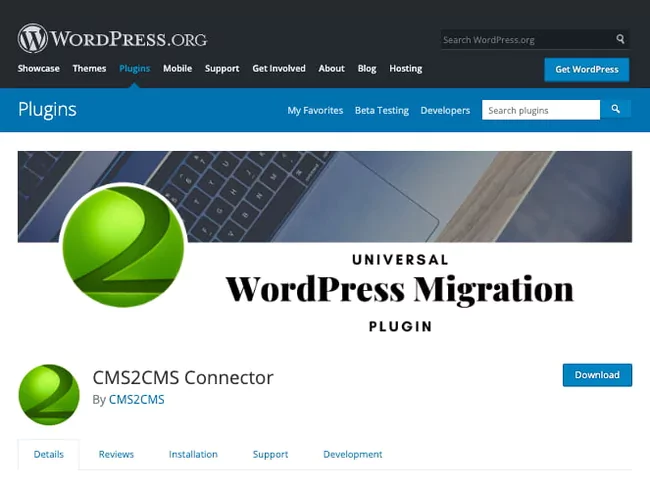
NB: You can download the plugin for free, but for migration, payment is essential.
After downloading the plugin, go to the WordPress dashboard and click the Upload plugin button.
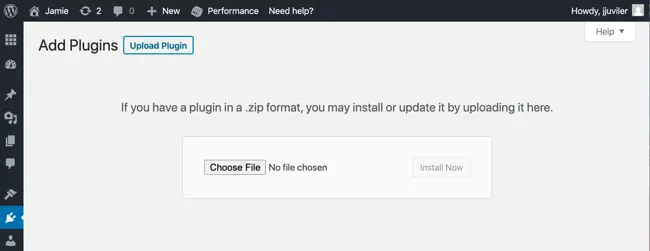
Next, activate it and your plugin is set to go!
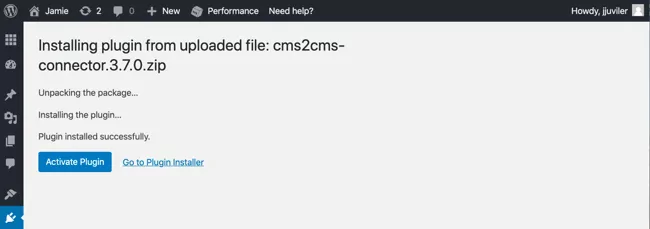
Step-3: Set Up The Migration Plugin
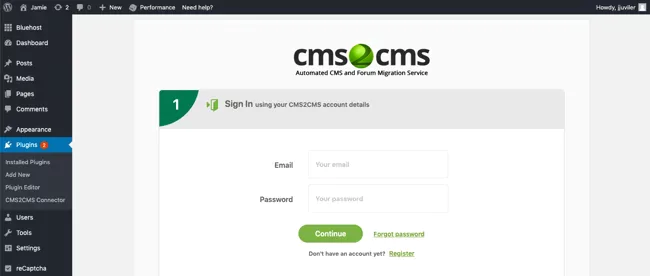
Go to the dashboard of CMS2CSM and choose Plugins. Here you will find sign in information. Add your email and password to continue.
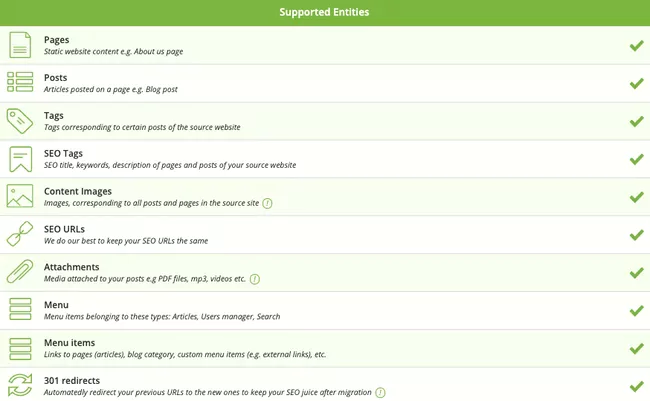
On the next page, you will find all the elements that you can migrate. It includes pages, posts, images, tags, and more.
Step-4: Run the Demo Migration
CMS2CMS offers you a demo migration option. You can click Start Free Demo Migration to preview the outcome. It will migrate 10 pages for a demonstration. The steps for a demo are as follows-
- Insert the URL of the Wix site for the source and the URL of the new WordPress site to destination sites.
- In place of CMS Type, type Wix to WordPress.
- You can also choose migration options rather than just posts, pages, and images. For example- in the theme setting, you can match the theme with a previous Wix account. Besides, URL redirection and options for making SEO-friendly URLs are also available.
- Click start migration, and you will get a demo.
NB: To skip the demo step, click ‘Skip demo migration and migrate all data to your website.’
Step-5: Run the Full Migration
After analyzing the demo, if you are satisfied, you can decide to purchase migration plans. Before that, check if you have chosen all the elements that you want to migrate. To ensure this, click on Complete Migration. The payment page will pop up. Clear your payments, and your migration will begin.
Check this Youtube video- Watch The Full Migration Process from Wix To WordPress Via CMS2CMS.
Post Migration Settings
Once you are done with your migration process, there are more steps to set up your new WordPress account. These include-
- Theme Installation
You can migrate posts, pages, images, and videos from your Wix account to WordPress, but not the templates. For this, you need to download a new template for WordPress. You will find thousands of themes for your WordPress account- free or paid. Both options are available. If you want to go for a free template, go to your dashboard and click- Appearance → Themes → Add New
You will find many free options; choose the one you find best and activate it.
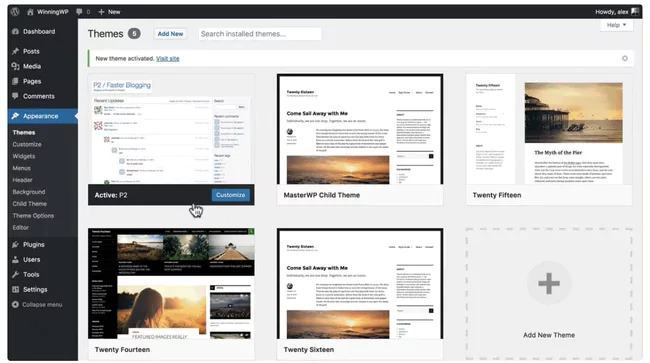
For paid themes, check third-party marketplaces to get the best pick. You can choose Astra, OceanWP, or something else that matches your website. Download the theme, return to your WordPress dashboard, and click Upload Theme. Your theme will be stored in the .zip file of your computer. Now select the Activate button to set the theme to your account.
NB: If you use CMS2CMS for migration, you can customize the theme of WordPress based on the Wix theme.
- Setup Other Functional Elements
If your previous Wix account has additional functional elements like contact forms, membership forms, coupons, etc., you can recreate this in WordPress. For this, WordPress has many plugin options to help you out.
- WordPress Site Testing
At this point, your WordPress website should be set. To ensure this, taste the website thoroughly. However, you must pay attention to the broken links. But how to check if all the links are ok? No worries, we are suggesting you some plugins using which you can detect the broken plugins and fix them. These are-
- Point Your Domain at the Destination Site
If you have purchased the domain from Wix for your previous account, transferring it to WordPress is quick and simple. Sign in to your Wix account and select My Domains Link. Then click- Relevant domain → Advanced tab → Transfer away from Wix → Send Code
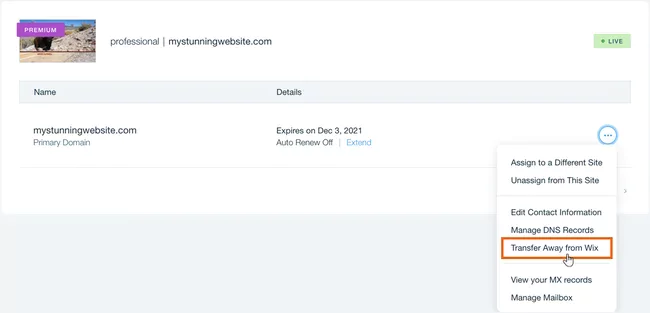
NB: At this point, you will receive a code via email to confirm you are the owner of this account. Verify it and move to the next step.
Now, you need to place this transferred domain to the temporary domain that we created at the pre-migration step. Go to the WP dashboard and click on Settings – General. A page will pop up with a form. Here change the temporary URL and place the live URL in WordPress Address and Site Address.
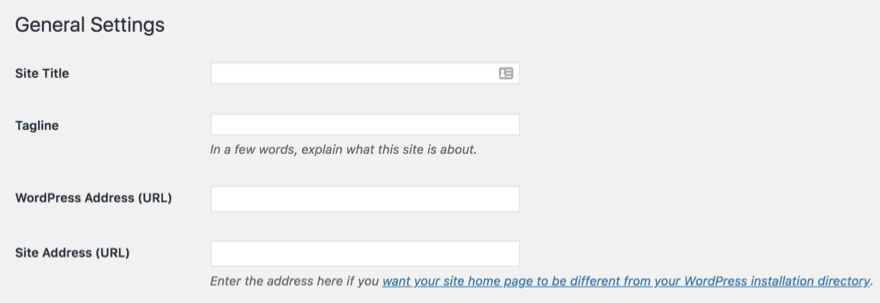
At this point, you will receive an email notification from your hosting service confirming your domain transfer. Thus, your migration from Wix to WordPress is successful, and the new account is set to go!
The Bottom Line
You are getting endless facilities in content management with WordPress. This gives thousands of reasons for migrating from Wix to WordPress. However, when migrating, the fact that you really should look at is the migration method.
We suggest you choose either a semi-automated process or fully automated migration via plugins. But if you have a small website with less content, you may think about manual options too.
Last but not least, WordPress optimization is essential for getting the best output from your website. For this, you can check this guide- 8 WordPress Website Optimization Techniques.

