Not satisfied with Squarespace services? Need greater control over your website? Switch to WordPress ASAP!
WordPress is currently the most popular CMS, ruling the web development landscape. And if you want to experience the advanced facilities and extended flexibility in content management, welcome to WordPress! However, switching from Squarespace to WordPress can be a bit tricky, as you will need to go through several steps. But no worries, our guide will help you complete the migration process with ease!
So why wait any further? Let’s jump into the discussion-
Why Should You Migrate From Squarespace To WordPress?
Before going to the migration, let’s first know whether switching from Squarespace is the right decision. To assure you of having a better outcome, we are presenting some logic for moving to WordPress-
- Ownership, Scalability & Flexibility
As WordPress is a self-hosted service, you will get greater control over its ownership. Besides, when it comes to scalability, nothing can beat WordPress. It doesn’t matter how big or crowded your website is; WordPress is enough to tackle the load. This also enhances your flexibility in choosing tools or taking assistance from third-party tools.
- Enhanced Customization Options
One of the main reasons for moving out of Squarespace is its lack of customization features. The plus point is that it has beginner-friendly interference that requires no tech knowledge to build a website. But as your website grows, you may need to add more functions and features, which is impossible with Squarespace.
In this case, WordPress can help you. It brings you thousands of themes and Block Editor features for the utmost customization. You can easily choose the layout and style of your pages as per your requirements.
- Get Plugin For Every Issue
Whether it is security, adding forms, slider, gallery, booking, or backup, WordPress has plugins for each of its functions. The integration of these tools makes your content management system more convenient. But you will not get these facilities with Squarespace.
- Search Engine Optimized
WordPress has built-in SEO features that help your content rank higher on SERP. Being a CMS, it handles 80-90% of Google’s crawling issues. So, you can get better traffic and reach from WordPress in comparison to Squarespace.
- Better E-commerce Facilities
Though you will get a built-in e-commerce function with Squarespace, it ties you with many limitations. For example- it does not support Google Pay or allow multi-currency payments. Besides, automatic tax rate conversion features are only available in the US.
The language option is also very limited. For these drawbacks, Squarespace may not be effective in grabbing international traffic. But no worries with WordPress; it has none of these issues. In fact, you can get greater e-commerce facilities with WordPress, including Bigcommerce and Shopify.
- Faster Performance
With Squarespace, you will not get control over the hosting services. But you can get this with WordPress. Choosing a managed WordPress hosting service will give you faster loading facilities and more. This will reduce the bounce rate and make your website more engaging.
So, now you know migrating to WordPress would be your best decision for boosting your website performance. However, to get better with WordPress, check out 8 WordPress Website Optimization Techniques.
How To Migrate From Squarespace To WordPress?
Migrating your Squarespace website to WordPress is pretty simple. To make it more convenient, we have divided the total process into three sections- pre-migration, migration, and post-migration. This will help you to transfer the account and set it appropriately.
Pre-Migration Steps
Before starting the migration process, you need to get a hosting service and set the WordPress. Here is the procedure-
Find A Hosting Service For WordPress: The good news about using WordPress is that it allows third-party hosting services. So, you can choose any hosting that supports WordPress configurations.
There are many options in hosting services like- SiteGround, Kinsta, Godaddy, Bluehost, etc. All of these options offer managed WordPress hosting that optimizes your website for better output. Yet, you should consider some features before choosing any hosting services. These include-
- Speed optimization
- Malware scanning, firewalls, and automatic security updates
- Specialized caching mechanisms
- Continuous customer support
- Free SSL certificates and setup
- Automatic backups
- Migration facilities
- Money-back guarantee for reliability
- Compatibility with most WordPress plugins and themes
To get the best options for WordPress hosting, check this article- 10 Best WordPress Hosting Providers.
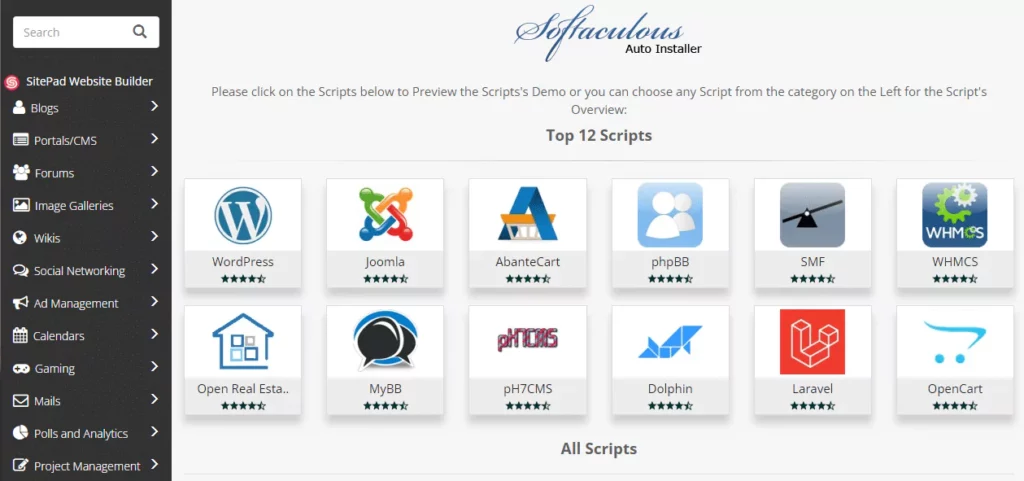
Install WordPress To Your New Hosting: Most of the WordPress hosting services offer you a pre-installed WordPress. By chance, if there are no such facilities, there is nothing to worry about. You will find a one-click installation option popping up on your screen. If not, check the control panel or user portal; you will surely find options.
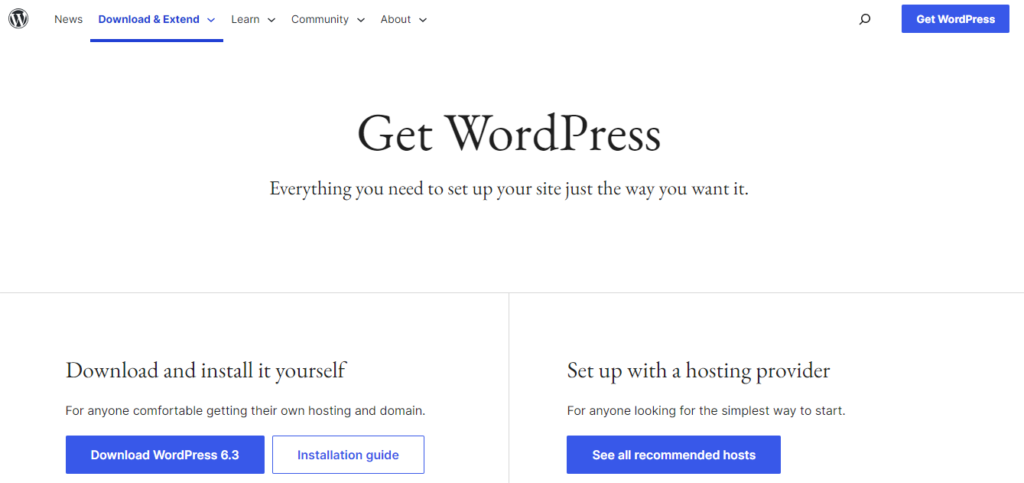
However, there is a manual installation option also available. Go to the official page of WordPress and install the latest version- https://WordPress.org/.
Migration Process
Once you are done with installing WordPress, you can move to the migration process. Now, if your Squarespace account is on fire and you are getting a lot of traffic there, moving it to an unreconstructed site won’t be an ideal decision.
That is, we suggest you set up the WordPress website first before launching your site to this new medium. When your new site is completely ready, delete the old account. The process is explained in the below steps-
Step- 1: Export The Squarespace Content In An XML file
Squarespace has exporting facilities that make the migration process simple. You can export Pages and posts, Text, and embed blocks in an XML file using Squarespace’s’ exporter’ tool.
But it doesn’t allow you to export all the elements of your Squarespace website. The below chart will give you information on what things we can export automatically and what you can’t-
| Can Export ✅(Automatic) | Can’t Export ❌(Manual) |
| 1. All basic pages (one blog and all blog posts within it) 2. Gallery pages 3. Image blocks 4. Embed blocks 5. Text blocks |
1. Templates 2. Album pages 3. Event pages 4. Custom CSS 5. Style changes 6. Audio or video blocks 7. Folder and index pages 8. Product pages 9. Product blocks 10. Any additional blog pages (only one blog page can be automatically exported) |
Now, follow the steps to download the content that Squarespace allows you to export-
- Go to your Squarespace account and click on Settings➡Advanced➡ Import/Export.

- Select the Export option. Different exporting options will pop-up on the screen, select the WordPress logo.

- The Squarespace will optimize your site for CMS and begin the exporting process. Once the exporting is done, you will get a download option. Click on it to save your export file in .xml format.

- Save this file to your computer. You will need this in the next step to migrate into WordPress.
Step- 2: Importing Your Content to WordPress
Though WordPress doesn’t have any direct importing tool for Squarespace, you can import the downloaded XML file. For this, go through the below points-
- Go to your WordPress Dashboard and select Tools ➡ Import. Look for the WordPress option and click on Install Now.
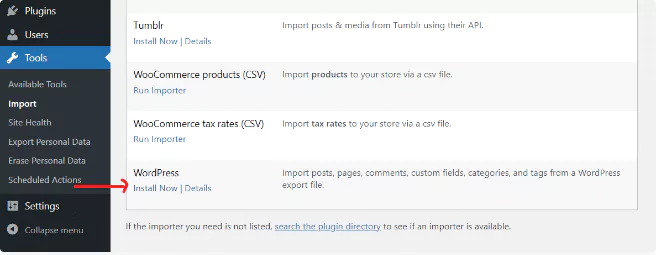
In case the WordPress importer tool is pre-installed, you will get a Run Import option. Click on it, and you will land on the Import Page. Here they will ask you to choose the XML file; click on Choose File.

Now, select the file that you download in step-1 and click Upload file and import. In the next step, you need to assign the author to get access to the imported contents. Provide the necessary information and scroll down.
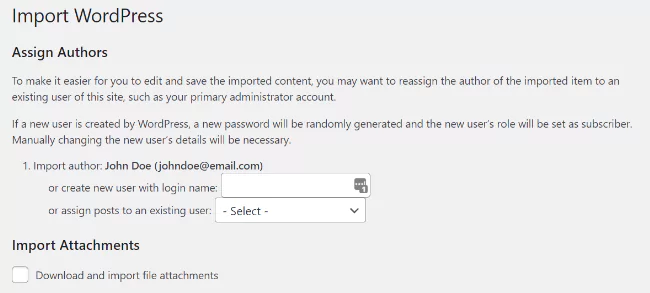
Below you will find an Import Attachments option. Check mark the box beneath this and click Submit.
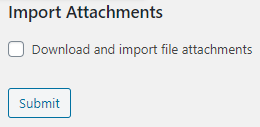
Your content from Squarespace will thus be imported to your WordPress account. And soon, you will receive a success message as the below screenshot-

Step- 3: Import Images
Though WordPress has amazing features to upload contents, the sad news is that it may not import the images automatically. In this case, you have to do this manually.
That means, copying each image from the previous account and pasting it to the WordPress account. This can be really time consuming if you are not having just a few images in your fresh website.
To get rid of this hassle, use WordPress plugins like- Auto Upload Images. This tool will help you to import images directly from Squarespace to WordPress site. It searches for the image URLs in your present accounts post and pages.
Then downloads them and uploads them to WordPress. It further replaces the original URL to avoid any link errors. Here is the process for image importing using this plugin-
Plugin Installation:
- Go to the WordPress dashboard and select Tools ➡ Plugins➡ Add New
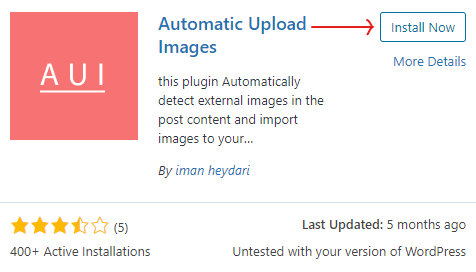
- Type the name of the plugin into the search bar; Auto Upload Images.

- Select the right plugin and install it.
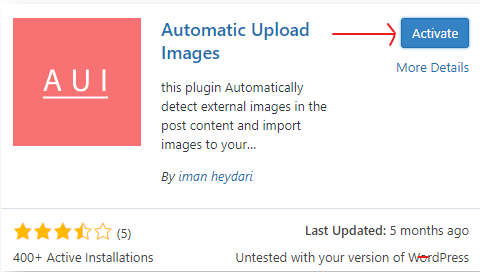
- Once it is installed, click on the Activate button. Now your plugin is ready to use.
Note: To enable plugins, you need to subscribe to the WordPress.com plugin-enabled plan.
Importing Images Via Plugin:
- Go to the dashboard of the plugin and click on Posts ➡ All Posts

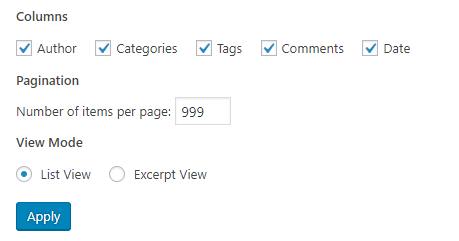
- Select Screen Options at the top of the editor, and a new page will appear.
- You will find an option named Number of items per page. Input 999 in the box, and click on Apply.
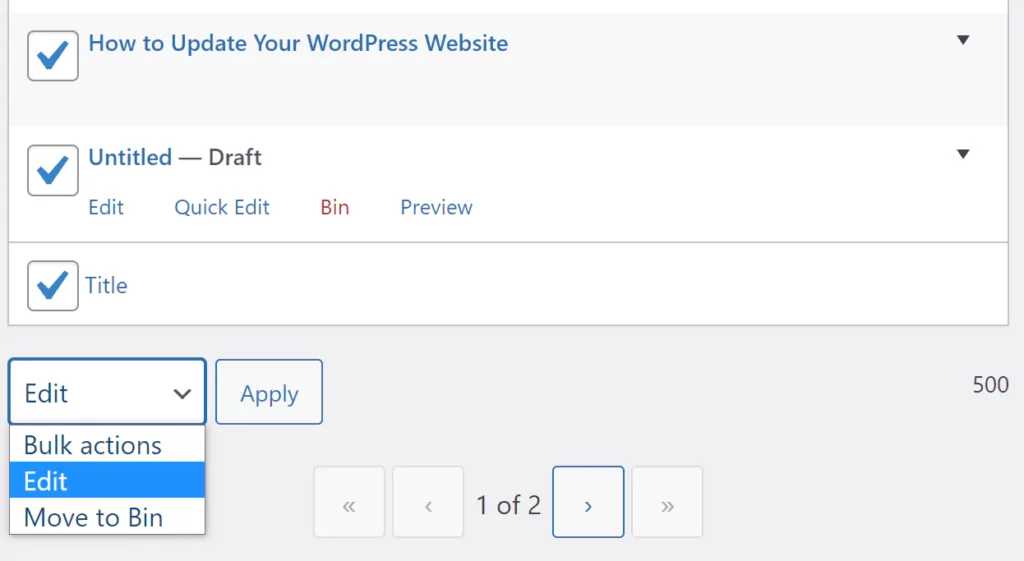
- Once the page gets reloaded, select all of your posts and then click Edit in the Bulk Actions section. Next, click Apply.
- Next, a box will pop up on your screen with an Update button. Click on it, and the plugin will trigger all the images/image URLs from Squarespace to WordPress site.
Note: Once you click on Update, the page will reload. If you are using a slow hosting service, it may take a long time to update or reload the page. To avoid this issue, you will have to import the images into small batches rather than taking them all at once. However, the number of posts you can select at once will depend on your hosting capability.
Step- 4: Transfer Squarespace Ecommerce to WordPress E-commerce
If you have a Squarespace e-commerce website, it should also be migrated to WordPress. But you can’t export the products by default within the bulk content. Here you need to export all the products to a single CSV and download it. Once you are done with downloading this, proceed to the next process of importing them to Woocommerce-
- Go to your Squarespace Home Menu and click-
Commerce ➡ Inventory ➡ Export all.
- Now, go to your WordPress Dashboard and select
WooCommerce ➡ Products ➡ Import.
- An Upload CSV File page will appear on the screen. Click on Choose File and select the downloaded Squarespace CSV. Now hit on the Continue button.
- Automatically, the Column Mapping screen will try to “map” (or match) the column names in your CSV to the fields in WooCommerce.
- Use the drop-down choices on the right side of each field to choose the fields you do not want to import. Unrecognized columns will not be imported by the importer by default.
- Click on Run the Importer. Your Squarespace Products will be transferred to WooCommerce.
Note: Please avoid refreshing or closing the browser tab while the importer is running.
Now you can have an excellent e-commerce experience with the WordPress Woocommerce plugins. This gives you more features, customization options, and control than Squarespace e-commerce.
Post-Migration Steps
Once you are done with the migration of content from Squarespace to WordPress, it’s time to set up the new site. You need to arrange the links, themes, and other elements before launching the new account.
Point Your Domain Towards WordPress: At this point, the domain of your WordPress is still pointing to Squarespace. Instead of getting a new domain, you can simply upgrade it, pointing towards WordPress. Thus, as the visitor types your domain, they will end up on your WordPress site.
Domain Mapping:
- Go to your Squarespace DNS settings and click on advanced DNS settings.
- Delete the default records in Website Defaults by clicking the trash bin. If the default records are still in use, your domain cannot point to WordPress.
- Find Custom Records by scrolling down. Choose CNAME from the drop-down option.
- Now, you will need to change the Name Server of the domain to-
| NS1.WordPress.COM NS2.WordPress.COM NS3.WordPress.COM |
Your domain will not be directed to WordPress instantly. You will find it still registered under Squarespace. But within an hour it will be directed to WordPress. Now that your domain mapping is done, you can move to the domain transfer process.
Domain Transfer: By transferring your domain, your domain provider will re-register your domain with WordPress.com rather than Squarespace. This makes sure that all upcoming billing is connected to your new site.
- Log in to your Squarespace account, and go to the dashboard.
- Click on Settings ➡ Domains.
- Click the domain you want to transfer and uncheck the Lock Domain box.
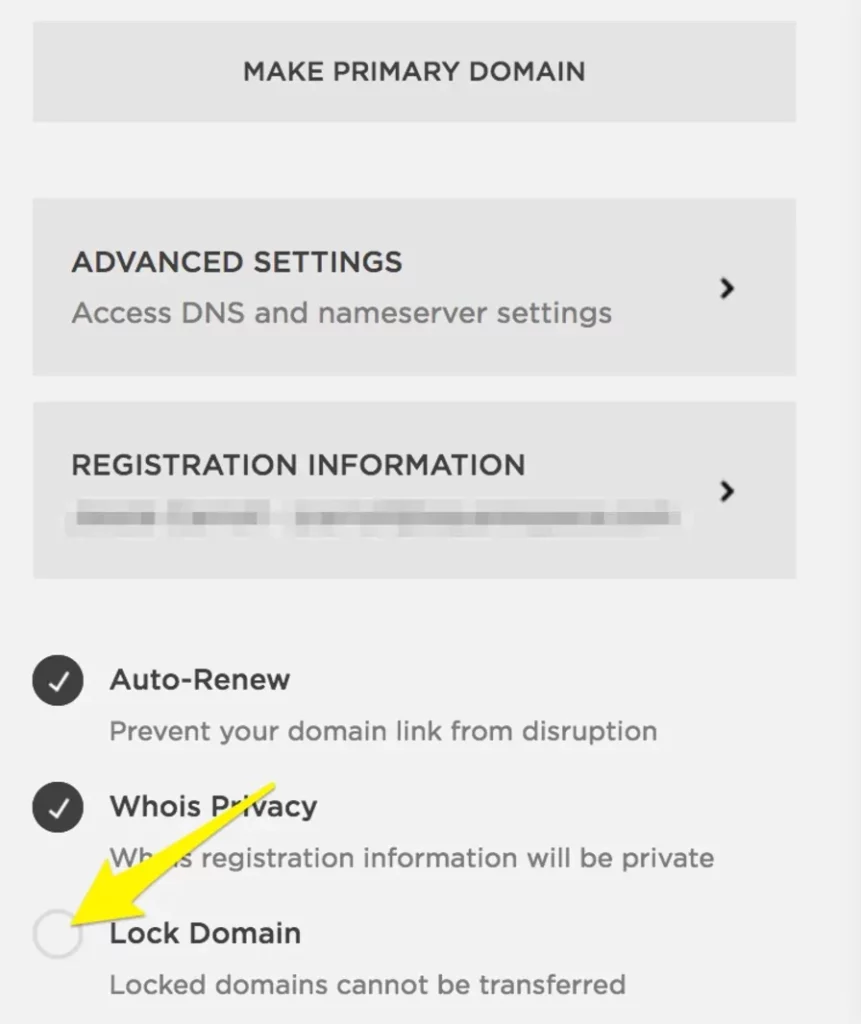
- From the bottom panel, you will get a Send Transfer Authentication Code requested by WordPress. The domain transfer procedure will begin after you approve the request.
Note: Domain transfer usually takes 5-7 days, and you can only transfer the domains that are older than 60 days. So, any domain name registered within the last 60 days cannot be transferred.
Change the Permalink Structure in WordPress: You will now see the URLs of WordPress posts and pages like this- yourwebsite.com/?p=123. This is the default URL or permalink structure of WordPress. Each page and post have a unique URL.
So, you need to change the permalink structure as soon as possible to avoid any issues with your search engine optimization. Below we are adding the procedure of changing the permalink structure-
- Go to your WordPress dashboard and click on Settings➡ Permalinks
- A Common Setting page will pop up with numerous URL types.
- Select Post name; it is the best option for URL. You can also choose other options, but we suggest you skip Plain.
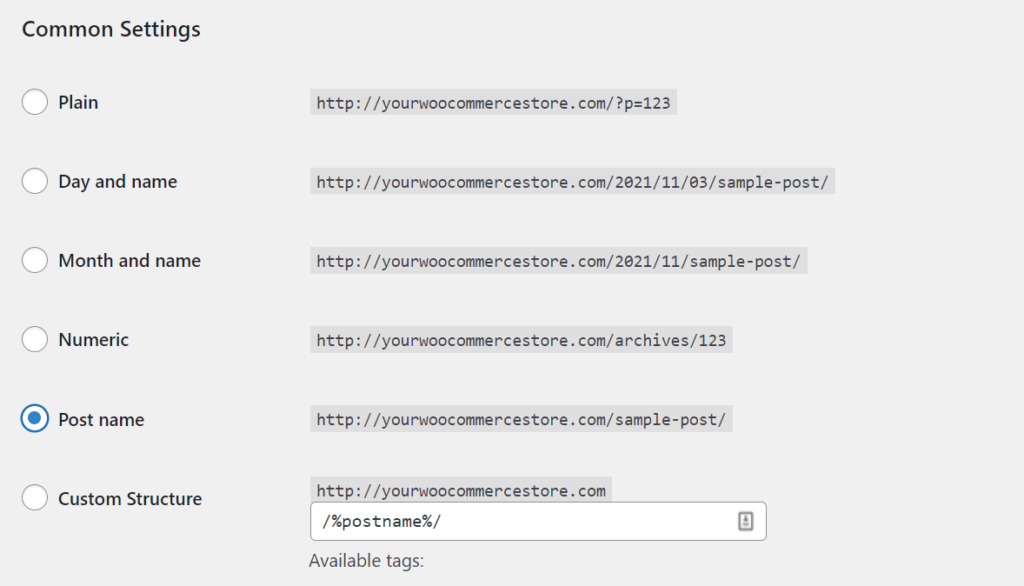
- Now, the Post name structure will produce the shortest and cleanest URLs as long as you use a unique slug for each post and page on your site.
Choose a Theme for Your WordPress Website: Now once all your content and links are set, it’s time to focus on the theme of your WordPress website. However, Squarespace has very polished theme options, but WordPress is not lagging behind.
You will get thousands of free and premium themes for WordPress. Besides, with Block Editor, you can customize the style or layout of your pages and posts in minutes.

The Bottom Line
There is no doubt that Squarespace is an excellent website builder. But for scalability or flexibility, switching to WordPress is the best, especially when your site is heavily dependent on e-commerce.
WordPress offers you thousands of plugin options that make your website management more convenient than using Squarespace. Besides being a self-hosted service, WordPress provides you better control and ownership.
So, if you are unsatisfied with your Squarespace services, don’t hesitate to move to WordPress! We can ensure you won’t regret it!

