Do you want more control over your Shopify store? Migrate to WordPress now! But can WordPress, an open-source web management system, beat Shopify as an e-commerce platform?
Switching from Shopify to WordPress will provide greater flexibility to run your business. The migration process is also quite simple. Using the WooCommerce plugin and importing Shopify products to it, you can quickly turn your WordPress CMS into a rock-solid e-commerce store!
If you don’t want to take the hassle of doing this on your own, there is also the option to hire an expert or go for any migration service provider.
In this article, we will present you with a detailed guide to migrating your Shopify store to WordPress. But if you are yet confused about whether it would be an ideal decision to switch, let’s explore the advantages of WordPress over Shopify-
Why Migrate From Shopify To WordPress?
WordPress is an open source that allows you to build any type of website. Using the WooCommerce plugin, you can turn WordPress into an e-commerce platform like Shopify. It offers you greater flexibility to run the store and add any features by using plugins.
Thus, you can get more control over your store by migrating from Shopify to WordPress. Here are some strong reasons for which you should consider switching to WordPress:
Greater designing option: Shopify has over 100 themes, of which 12 are free and the rest are paid. In contrast, WordPress offers you over 31,000 options for themes! If you want, you can also get something similar to your Shopify theme and balance the outlook after migration.
Apart from these, WordPress enables you to customize each section of the site. So you can get your desired website design.
Better SEO: Your site’s visibility largely depends on search engine optimization. Though Shopify has a built-in SEO facility, it can’t beat the flexibility of WordPress. With WordPress, you can edit every aspect of your site for better optimization.
Besides, many advanced SEO tools integrate with WordPress. Thus, you will get a better SEO facility migrating from Shopify to WordPress.
Payment gateway integration: Using the WooCommerce plugin, you can turn WordPress into an e-commerce store. And both Shopify and WooCommecre give you good payment gateway integration. But with WooCommerce, you can use less popular gateways that may be helpful for international sales.
Besides, in Shopify, you must pay transaction fees for using other gateways except Shopify Payment. In contrast, WooCommerce doesn’t charge you transaction fees whether you choose WooCommerce Payments or any other gateways. This will save you from additional transaction costs by using WordPress.
Shipping costs and tools: Shopify permits business owners to add shipping costs and print shipping labels from their accounts. Additionally, it offers discounted rates from DHL, UPS, and USPS. However, you need to have an Advanced plan, which costs a whopping $299 per month, in order to display live carrier pricing.
In contrast, with the WooCommerce Shipping extension, you can print labels quickly from your dashboard and take advantage of special deals with USPS and DHL. Additionally, for just $79 a year, WooCommerce enables you to display real-time shipping quotes from carriers. So, the shipping cost and tools are much more affordable with WordPress.
Other e-commerce features: WordPress gives you better control over blog and content management than Shopify. Besides, in product variants, Shopify limits variations on each product to 100. Whereas with WordPress, you will get unlimited variations.
Again, only those who sell things online use Shopify. But with WordPress, you may integrate e-commerce with standard informational websites into one. Above all, you need not be limited to the Shopify features.
You can add whatever features you want using WordPress plugins. Thus, you will get better control over your store with WordPress.
Migrate From Shopify To WordPress – A Complete Guide
In this guide, we have divided the migration process into three parts to help you better understand. You will find alternative options for migration methods, too. So, let’s begin-
Pre Migration
Before getting directly into the migration process, you need to prepare a suitable hosting platform, install WordPress, and back up your Shopify store for security. These processes are discussed below-
1. Backup Your Shopify Store
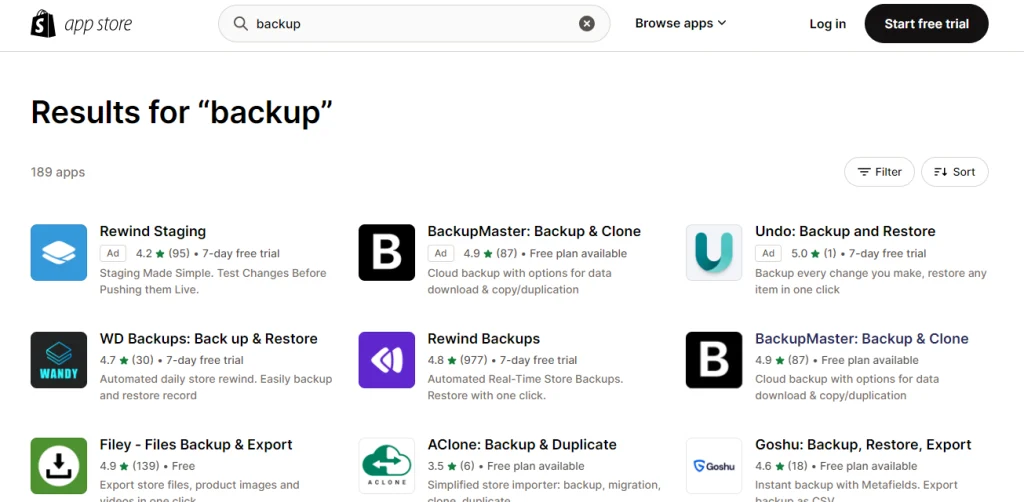
Before making any major changes to your website, it is always better to have a backup. Unfortunately, there is no built-in backup facility in Shopify. Though you can export the product data through a CSV file (we will discuss it in the migration process), there is no feature to store the design or other details.
Yet, if you want a real backup, go to the Shopify App Store to get a backup app. You can go for BackupMaster: Backup & Clone, Rewind Backups, etc. About 189 backup apps exist for Shopify; choose the best fits your requirements and secure your store data.
2. Select A WordPress Friendly Hosting
Shopify is a fully hosted platform. So, when switching to WordPress, you must look for a new hosting service. Managed WordPress hosting services are available that are designed specially for WordPress.
Using such hosting services will provide you with additional facilities for WordPress websites. For instance, they support most WordPress plugins, so you won’t face compatibility issues. Besides, these hostings have better SEO facilities and more inbuilt WordPress- friendly features.
GoDaddy, SiteGround, Namecheap, and WP Engine are excellent options. For more details on choosing the best WordPress hosting, check this article- 10 Best WordPress Hosting Providers.
3. Install WordPress
Usually, managed WordPress hosting services come with pre-installed WordPress. In case you don’t find this, no worries; go to the hosting control panel to look for a software installer like Softaculous. This will enable you to install WordPress in minutes.
Besides, if you find these processes tricky, go for WordPress. Go to Google and search for the official WordPress website- WordPress.org, and download the latest version available.
4. Activate WooCommerce
To run your online store in WordPress, you will need a plugin that supports e-commerce features. WooCommerce is the best option to go for. It is a free ecommerce plugin designed for WordPress.
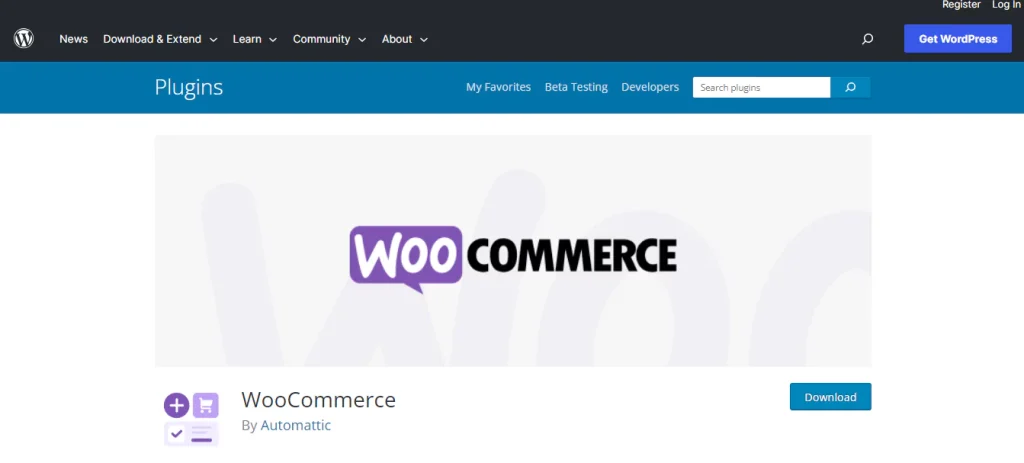
After installing WordPress, you will get access to its dashboard. Go to the dashboard and navigate to Plugins>Add new. You will find a search bar in the top right of the screen. Type ‘Woocommerce,’ and the plugin will pop up.
Click the Install Now button and the plugin will be installed in WordPress. It will take some time to download, so wait until the Activate button appears on the screen. Once the button appears, click it, and the plugin is ready!
Migration Process
After installing Woocommerce to your WordPress, you can move to the migration steps. For this, first, you need to export the products from Shopify and then import them to WordPress. Here is the process:
Export Products From Shopify
You can export the Shopify product or information manually as a CSV file or by using an app. Then, import this Shopify information to WordPress to complete the migration process. Let’s learn the process of exporting Shopify products:
- Manual Exporting As CSV File
Exporting the product data of the Shopify store in a CSV format is an easy solution. You can export all the product-related information like- titles, slugs, tags, variants, and prices as CSV. First, go to your Shopify dashboard and navigate to Product >All Products.
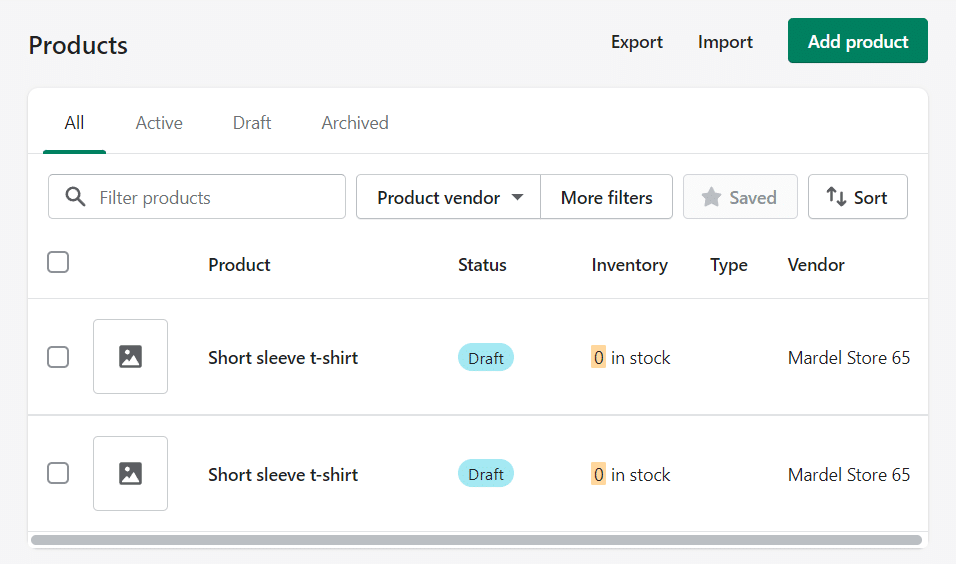
The page will open up the entire list of your products. At the top, you will find Export, Import, and an Add product button; click on the Export button.
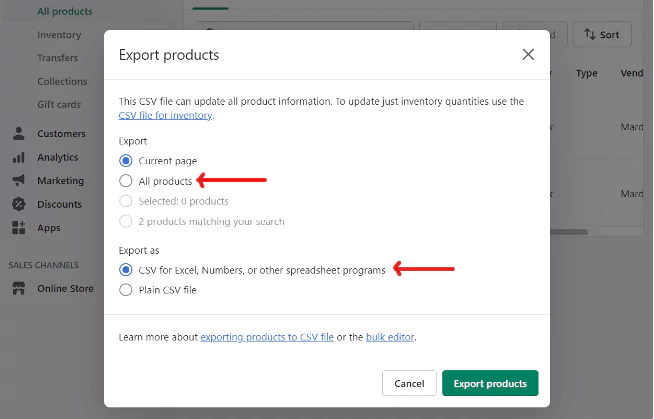
The export product page will open up with two fields; ‘Export’ and ‘Export as.’ Shopify will ask you to checkmark the products you want to export. As we are migrating the store, select the All Product.
Under the Export, choose CVS for Excel, Numbers, or other spreadsheet programs option. Then click on the Export product button at the bottom. Shopify will export all the product information in a CSV file and email it to you.
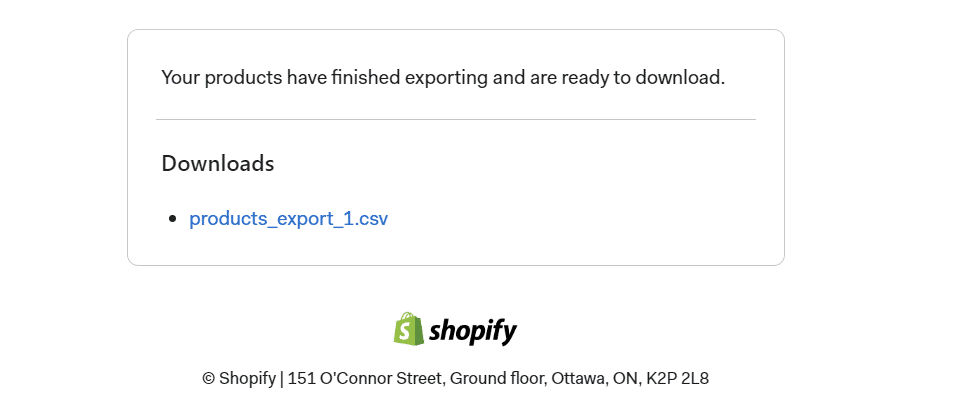
It may take some time to receive the email based on the file size. So, wait for a while. After receiving the email, you will find a link to the CSV file. Click on it, and your file with all the Shopify product information will be downloaded. Save the file to your computer for the next step.
- Exporting Via App
Another quick way to export your Shopify product list is to use an exporting tool, Shopify2Woo, or Shopify to WooCommerce. This allows you to export the product information in a standardized format, which you can import to your WordPress.
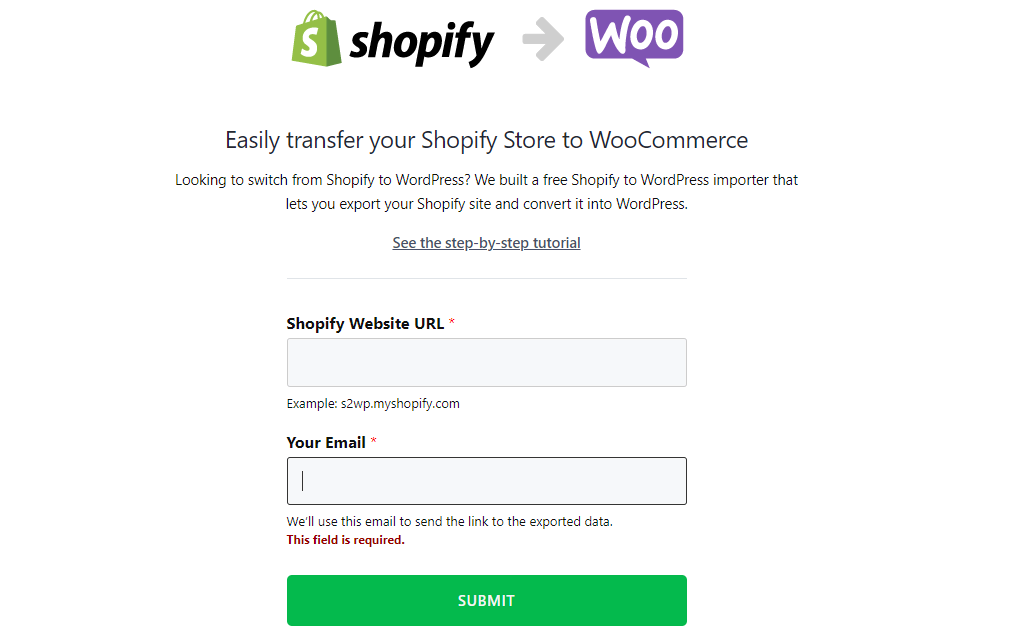
Using this tool, you can export all product data, product categories, customer data, and orders. However, this app can’t export the pages or blogs; you will have to export them manually.
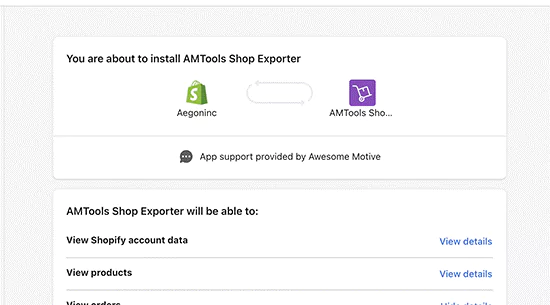
To start the process, go to the website of Shopify to WooCommerce and enter the URL of your Shopify store and your email address. This will lead you to the Shopify admin section to install the app.
It will automatically generate a Shopify API key for data migration. Using the Shopify API. Now, scroll down and click on the ‘Install App.’
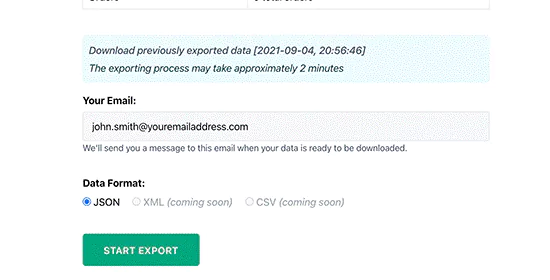
Once the app is installed, you must enter an email address where you will receive the exported file. Below the email section, you will need to choose the file format and click on the ‘Start Export’ button to continue.
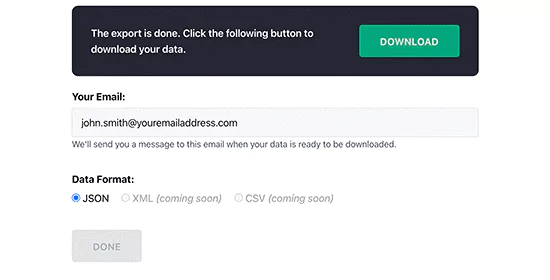
As the transfer proceeds, you can see the progression on the screen. After completing the process, you will find a download button. Click on it to download the file on your computer. You will receive an email with the link to the exported file.
Import Your Shopify Products Into WordPress
In the above process, you downloaded the Shopify product in CSV format; now, you must import that to WordPress. You can easily migrate the file to WordPress, having little technical knowledge.
Yet, if you don’t want to take the hassle, hire an expert or seek help from a migration service. All the three processes are as follows-
Method #1: Migrate By Yourself
If you decide to process all by yourself, there are two ways open- either go for the manual option or use a plugin. The manual process can be a bit time-consuming, but it’s easy to do. Yet, it is better to use an importing plugin for a faster solution. Both the process are as follow-
- Import Manually
Go to the WordPress dashboard and navigate to Tools > Import. Find the WooCommerce products (CSV) option and click on Run Importer.
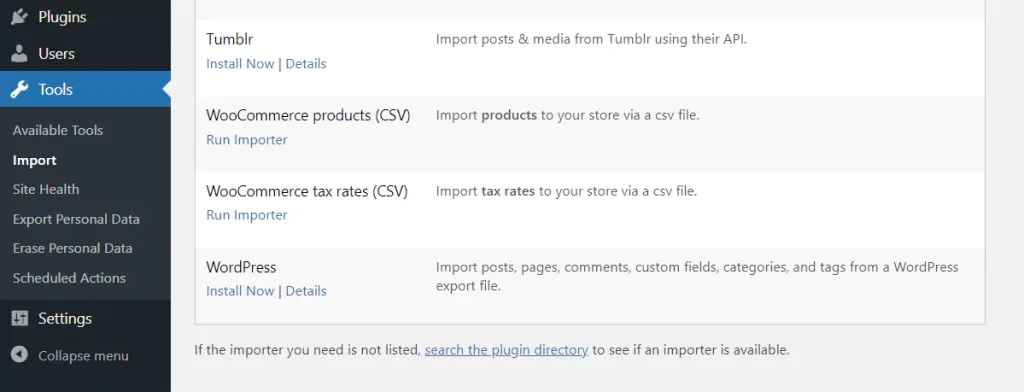
This will land you on a new page, where you can choose the file you want to import; select the CSV file you downloaded before. In the next section, you will find an option called ‘update existing product’; leave it unchecked and click the Continue button.
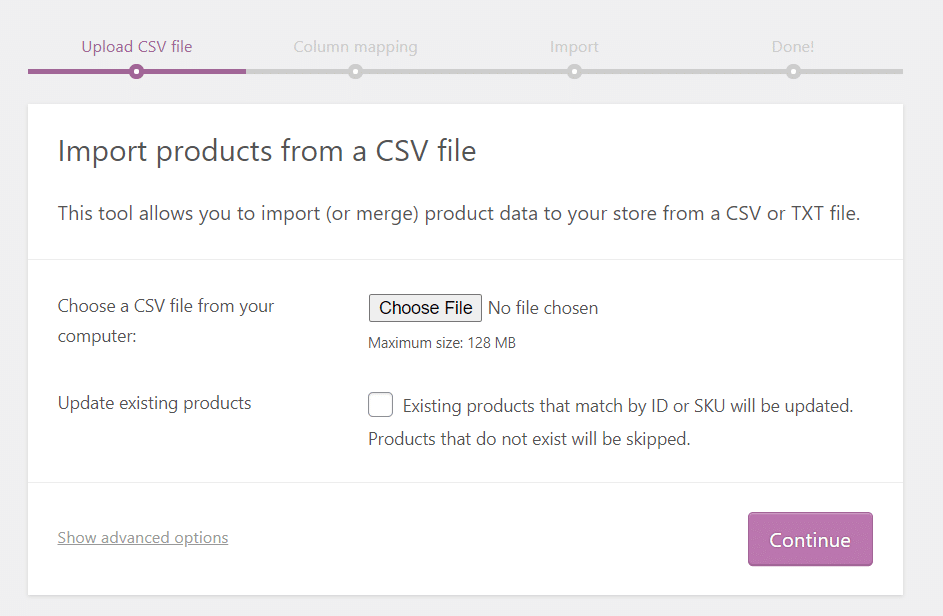
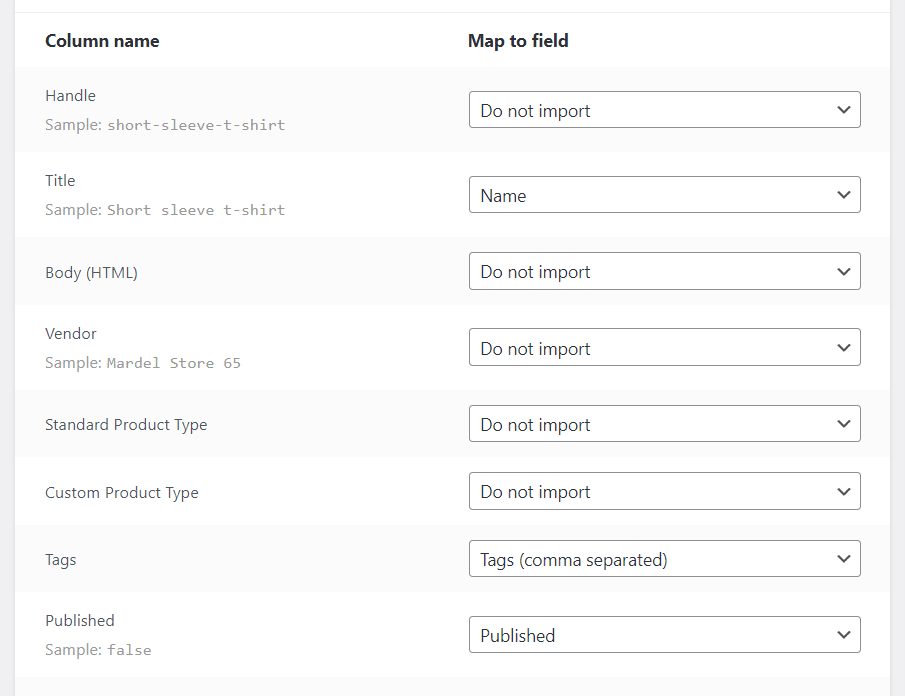
On the next page, you will find different options to choose that match the product data of the CSV file. Look over the available options and select which information you want to add to WooCommerce and which you feel comfortable omitting.
However, the Column Mapping screen will automatically compare the column names of the Shopify CSV file to the product fields in WooCommerce. Yet, you may need to choose some options manually; for this, use the drop-down marks to the right of each row.
You can omit some fields, such as SEO Title and SEO Description because WooCommerce doesn’t have alternatives for them.
Next, click the Run Importer button once you are satisfied with your option selection. This will take some time to import the data. So, be patient. Once the process is complete, you will receive a notification that looks something like this-
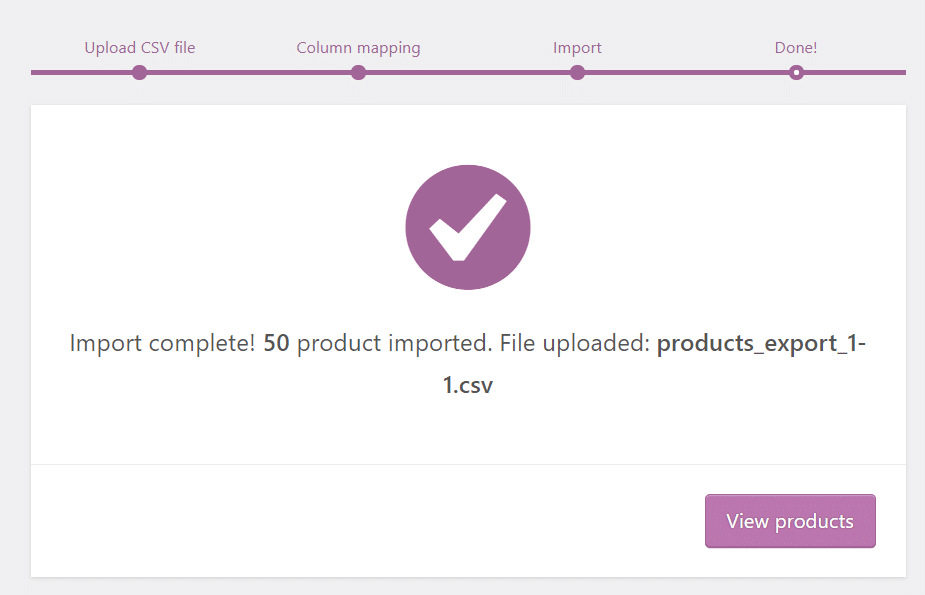
Clicking on the View product button, you will be able to see the product list to overview the item you imported. You can get into this list any time by navigating to the WordPress dashboard> Products > All Products tab.
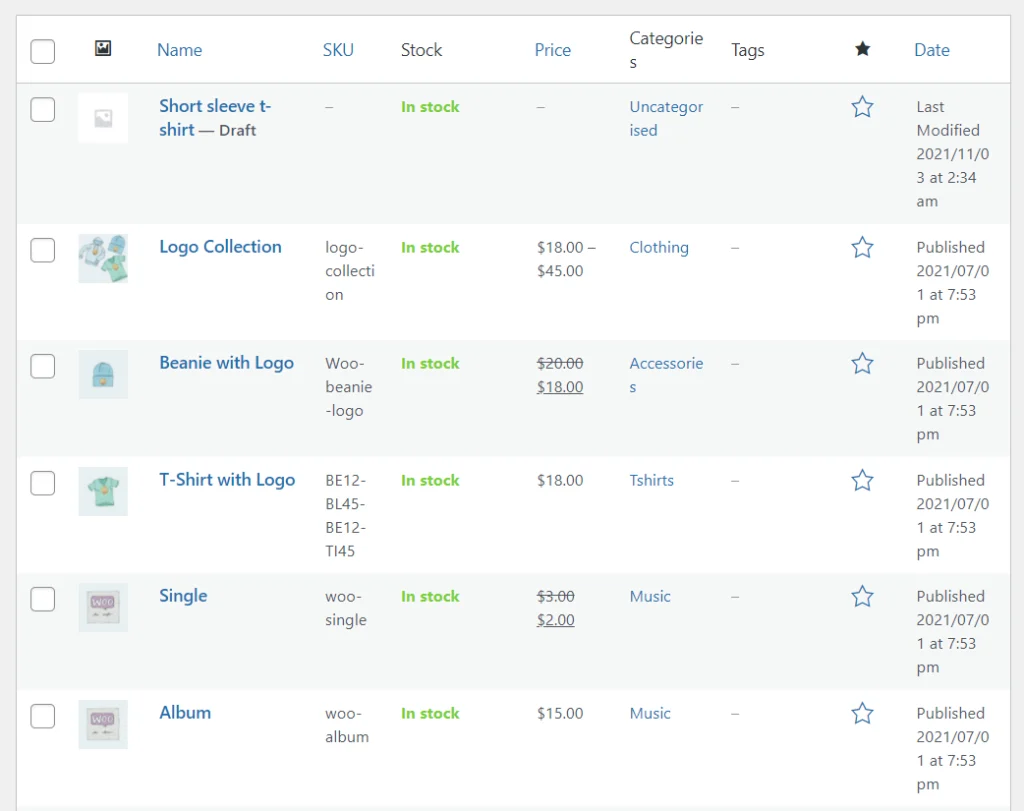
NB: WooCommerce won’t import the product images, customer or order data. So you will have to import them manually. Besides, we advise double-checking each item entry to make sure no crucial details are missing. In case there is any missing product data, you can rerun the importer.
- Use Importing Plugin
Using plugins, you can quickly import the Shopify product data on your WordPress site. You will find several plugins for this, for instance, Import Shopify To WP plugin. Go to your WordPress dashboard > Plugins > Add new to get this.
Search the name of the plugin and click on Install Now. After installation, activate the plugin and follow the below procedure to import the Shopify product data to WordPress-
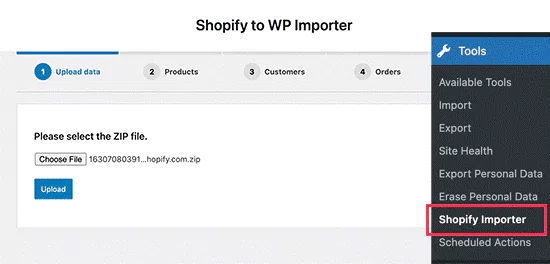
Go to the WordPress dashboard and navigate to Tools > Shopify Importer. The page will open a field to select the file you downloaded from Shopify. Click the Choose File button to select the file and click the Upload button.
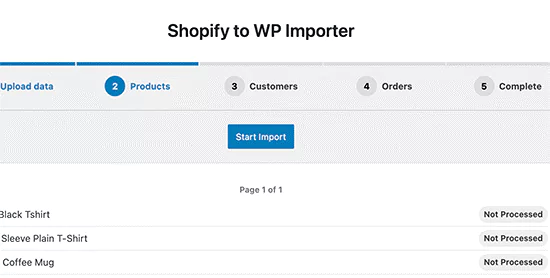
On the next page, you will find a list of products that you just uploaded. To start the importing process, click the ‘Start Import’ button. It will start importing, and you can see the progress on the screen.
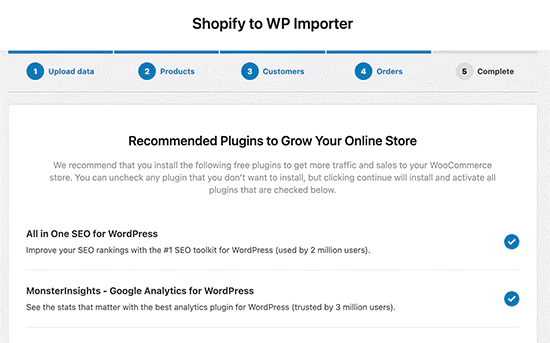
In the next step, it will suggest some plugins. Simply click on the Continue button to move forward.
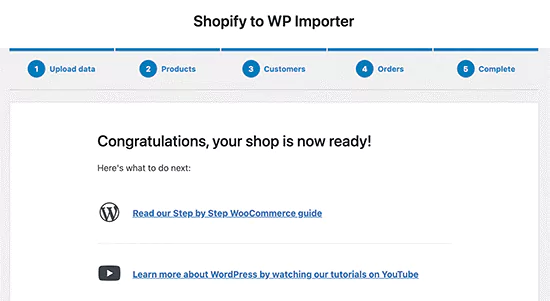
Finally, you will land on the complete page, where you will be notified for completing the process.
You can now go to the WordPress product list to check if all the data is exported properly. In case something is missing, import them manually.
Method #2: Hire Expert
If you don’t want to execute the migration yourself, get an expert’s help. Visit WooExpert Marketplace to get in contact with the certified experts. You will find a professional software developer who can help you with the migration of your store.
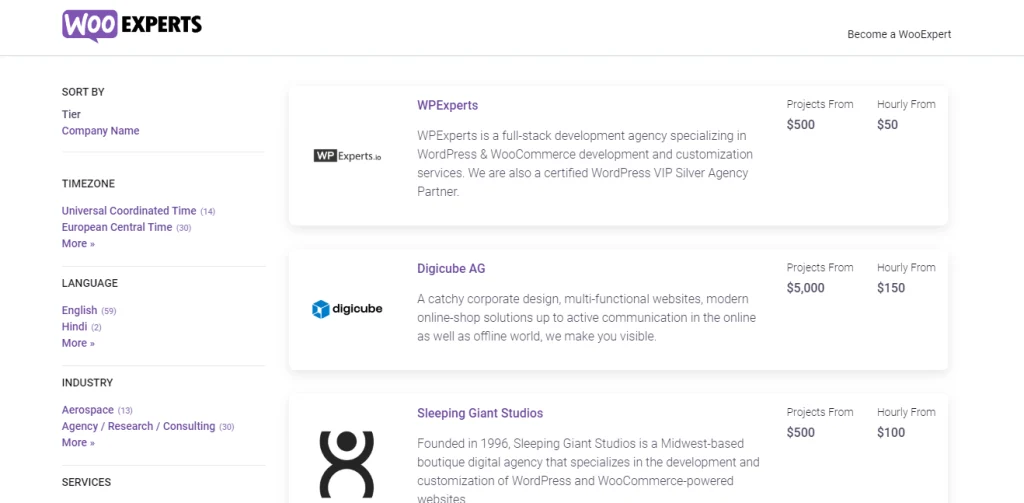
For this, you can skip the above steps. Contact them and provide your Shopify store information, and they will migrate it to a new WordPress website. You can filter the experts by country and view their profiles to check out their previous works. Thus, handover your store to a reliable developer for the migration.
However, you can also look on LinkedIn, Fiver, Upwork, or other marketplaces to hire an expert who will assist you with migrating Shopify to WordPress. Besides, you can also ask for help from any friend or anyone who can handle these procedures.
Method #3: Use a Migration Service
The easiest way to migrate Shopify to WordPress is by approaching a migration service. Many migration services provide quick solutions to switch your platform. Though you need to pay a big amount for the service provided, it will ensure your store is migrated accurately. So, a migration service is the best option if you want a reliable medium. Below, we have listed some choices for you-
- Cart2Cart
Cart2Cart offers you some limited migration options. But if you want a complete migration service, you will need to pay for it. The price depends on the amount of products or elements you want to migrate.

Visit their website, select the platforms you want to migrate (Shopify to WordPress) and click the Get Estimates button. In the next step, insert the number of products, customers, and orders. You will get the estimated cost.
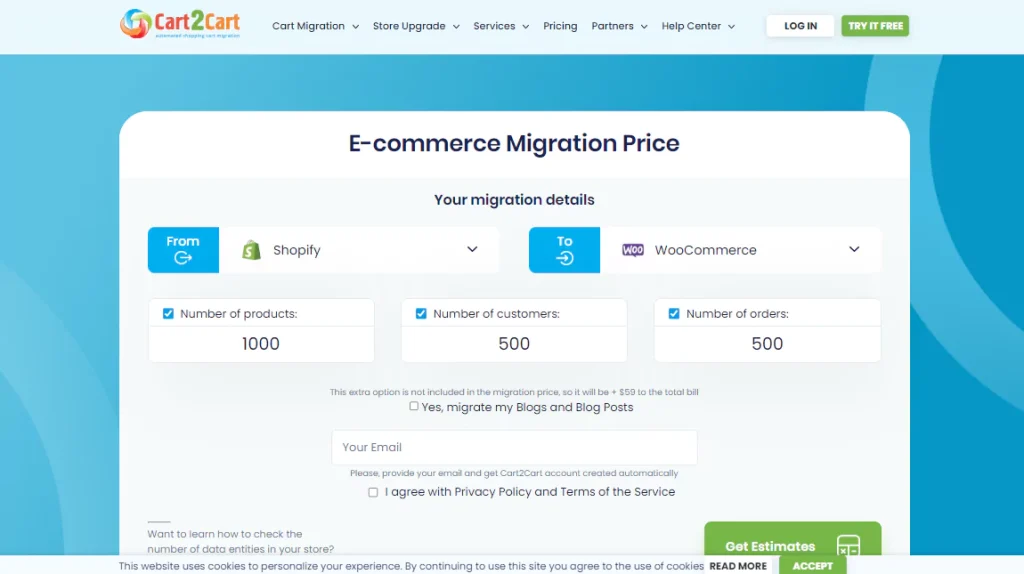
For example, if you want to migrate 1000 products, 500 customers, and 500 orders, the estimated cost is $69. If you want to include blogs and posts on the migration list, you will have to pay an additional charge. The migration process is very simple; you need to follow three steps:
- First, you need to choose the source and destination card. Select WooCommerce and Shopify from the drop-down lists, then enter the URLs for the stores in the respective fields.
- To customize your Shopify to WooCommerce conversion, select the data you wish to migrate and choose other additional options.
- Run a free Demo to test the functionality of the Cart2Cart service, and when satisfied, start the Full migration.
However, if you want service packages from migration experts other than the automated app services, it will cost a big amount.
- Next Cart
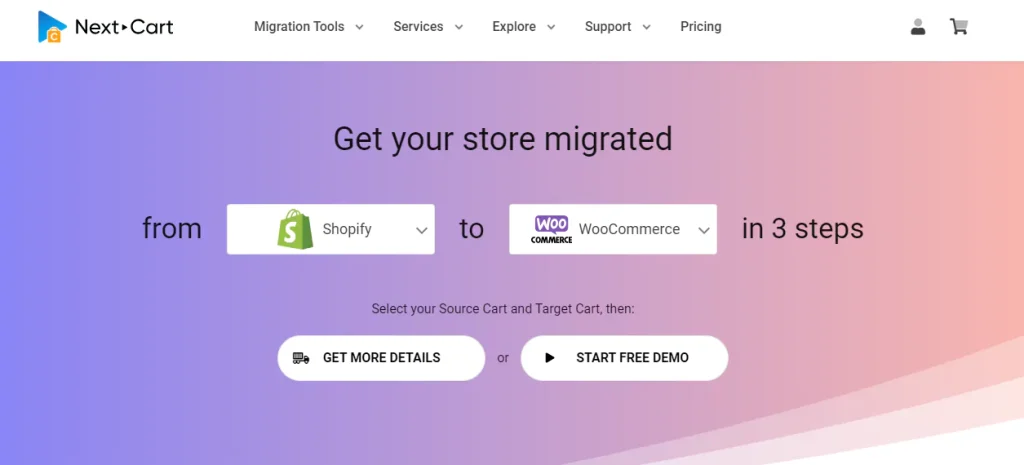
Next Cart is another migration service as Cart2Cart. With this service, you can migrate products, images, orders, categories, and more. They are similar in usage. Select the platforms from where and to which one you want to migrate. You can check the cost from the price calculation page, run a free demo, and proceed with the migration process accordingly.
- Lit Extension
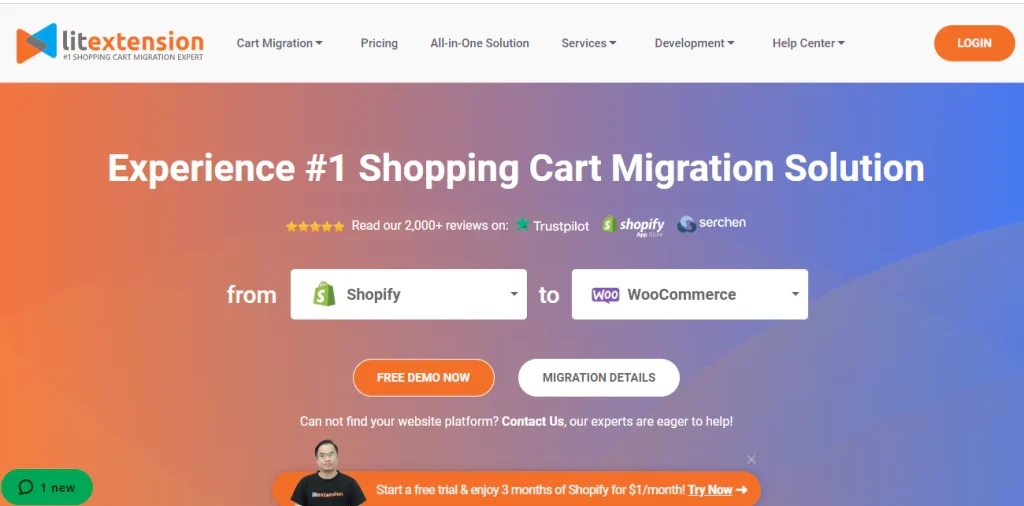
Lit Extension is another popular migration service provider. They have earned a high reputation for their quick service. The function is similar to the above-mentioned tools. You must choose the number of products, customers, and orders you want to migrate and check the estimated pricing.
Then, run a free demo and start your migration process. It will take around an hour, more or less, based on your website’s site. After your migration is complete, check if everything is alright, and then move to set up your new WordPress or Woocommerce website.
After Migration
Once you are done with your Shopify product and content migration, there are more things to do. To ensure your WordPress works perfectly, you need to fix the links, design of the site, and other settings.
However, if you hire an expert or take the help of any migration services, you can handle these hassles upon them. Yet, if you want to keep it on your hand and don’t want to spend money on these, the below process is for you-
Configure Your WordPress Permalinks
As you have migrated your Shopify store to WordPress, the URL will take its structure as set by WordPress by default. It looks something like this: mywoocommercestore.com/?=123
The URL structure plays a crucial role in search engine optimization. And this default URL structure is not SEO-friendly. The good news here is that WordPress allows you to choose your URL structure for WooCommerce products.
So, to make your WordPress site more user-friendly, you need to change the URL. However, do this step at the very beginning of starting your new WordPress store; changing the link structure later can negatively affect your site’s SEO and result in serious mistakes on your website.
The more quickly you establish a permalink structure, the less trouble you’ll have afterward.
For this, navigate to the WordPress dashboard and go to Settings > Permalinks > Product Permalinks. This will bring you some URL options to choose from.
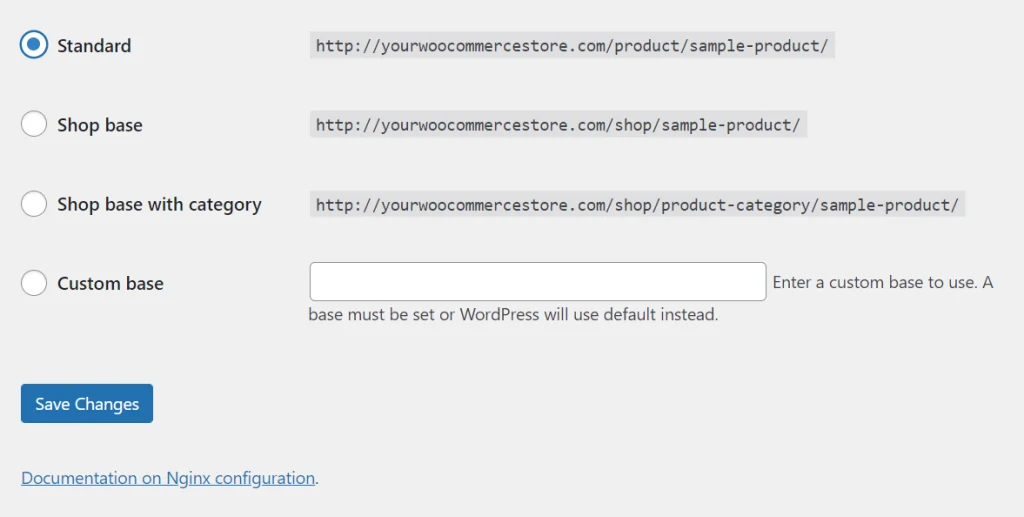
Most of cases, we would advise you to choose the Standard structure. A WooCommerce product URL with it will resemble this: mywoocommercestore.com/product/sample-name
You must use descriptive names when creating URLs of this type since they tell users about the product they are viewing. Save the adjustments to your WordPress website once you’ve decided on a permalink structure.
Setting Up Redirects
Redirects transfer visitors and search engine traffic from your previous Shopify website to your new WooCommerce store effortlessly. In this manner, if a customer visits the incorrect website, you won’t lose them.
However, you cannot set up individual redirects if your store has a domain name branded with the Shopify domain name (for instance, mystore.myshopify.com). Adding a link to your new store by modifying your Shopify website is one simple way to handle this.
In this section, we have listed a complex redirecting guide, following which you can move all the links from your old site to the new one. Let’s begin-
- Point Your Shopify Domain to WordPress
At this point, though your WordPress site is running, your domain is still directing people to your Shopify store. For this, you need to fix the domain. But now, you may not want to register a new domain as you must start creating traffic from the beginning.
Thus, losing a sizable portion of your consumer base is risky. So, if you have a customized domain name in Shopify, you bring that site’s traffic to WordPress by setting up redirects. You must modify the DNS settings for your domain to accomplish that.
To manage your domain settings, Go to the Shopify dashboard and then to Online Store » Domains. Now, input the new hosting companies’ DNS server address. Following this process, you can redirect the domain if it is registered via Shopify.
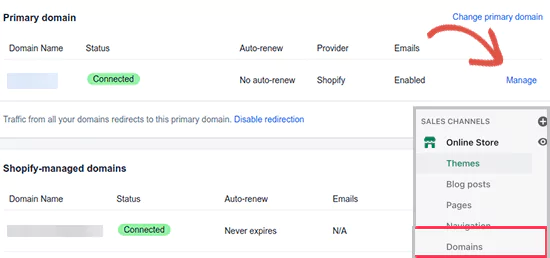
However, for other domain registries, the redirecting procedure will differ depending on your service.
- Update URLs in WordPress
There might be links to your previous Shopify-branded domain in your product descriptions. Instead of searching for each URL individually, using a plugin is a simple method to update all those URLs simultaneously.
For this, the Go Live Update Urls plugin is a great option. Install and activate the plugin and then navigate to the WordPress dashboard. Select Tools > Go Live Page; you will find a text field there.
Input your Shopify store URL as the old URL and your WordPress domain name as the new URL. Next, click the ‘Update Urls’ button, and it will fix all the links within your site.
- Setting Up Redirects for Individual Pages and Posts
You should guide visitors and search engines to the appropriate page if you have any posts or pages. You can do this easily by using plugins like the All in One SEO (AIOSEO) plugin. Although AIOSEO has a free version, you must have at least the Pro plan if you want to access the Redirection Manager tool.

Install and activate the pro plan of the plugin. Next, navigate to the WordPress dashboard and select Tools>Plugins>All in One SEO>Redirects. In the screen, you will find a form where you will see a ‘Source URL‘ field; enter the old URL under that. Next, in the ‘Target URL’ field, type the new URL of the page/post.
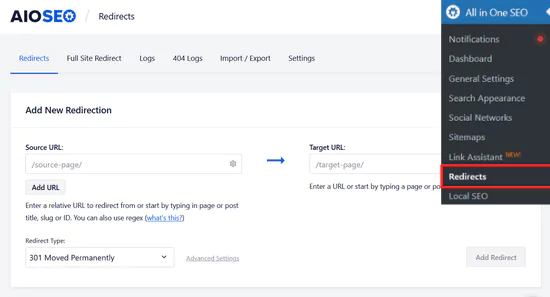
The Redirect Type must be “301 Moved Permanently.” To save your changes, click the ‘Add Redirect’ button. Thus, redirects can be added for each of your other URLs by repeating this procedure. In addition, AIOSEO will retain a record of all the redirects you’ve set up. You can then observe how many people clicked on the redirected link.
Customize Your WooCommerce Store
In this stage, your migration is complete, and it’s time to focus on the new website’s outlook and functionality. So, let’s dig in-
- Choose A Theme
WordPress is well-known for its thousands of themes. You will find vast options in choosing themes for your new store, both for free and paid versions. However, we suggest you select something similar to your previous theme.
The plus point is that your customers won’t feel like landing on a new space when they visit your migrated site. In this case, choose a theme wisely. Besides, as WordPress allows you extensive customization options, you will be able to bring a desired UX/UI design.
Nevertheless, the point to be noted is that whatever theme you choose, ensure it is suitable for WooCommerce. Because all WordPress themes are not designed based on e-commerce, a wrong theme will get you in trouble while arranging your products.
- Landing Page Design
The landing page design of your website plays a crucial role in building your brand identity. In this case, WordPress brings you the quickest solution that you dream of. Just look for landing page plugins like OptinMonster, SeedProd, and Thrive Architect.
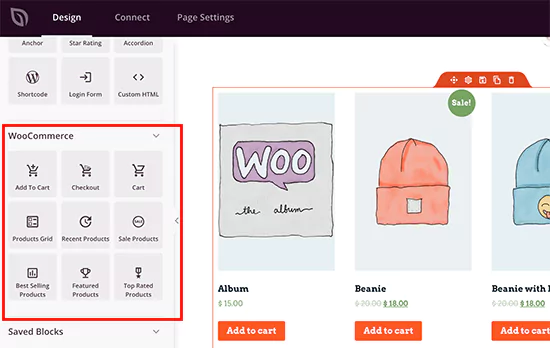
They are great for WooCommerce stores. You will find different template options for designing your store. This allows you to customize the store as you want.
- Configure Other Settings
After setting up the themes and basic outlook of your new WordPress site, you need to look out to set the WooCommerce features to enable online selling. This includes-
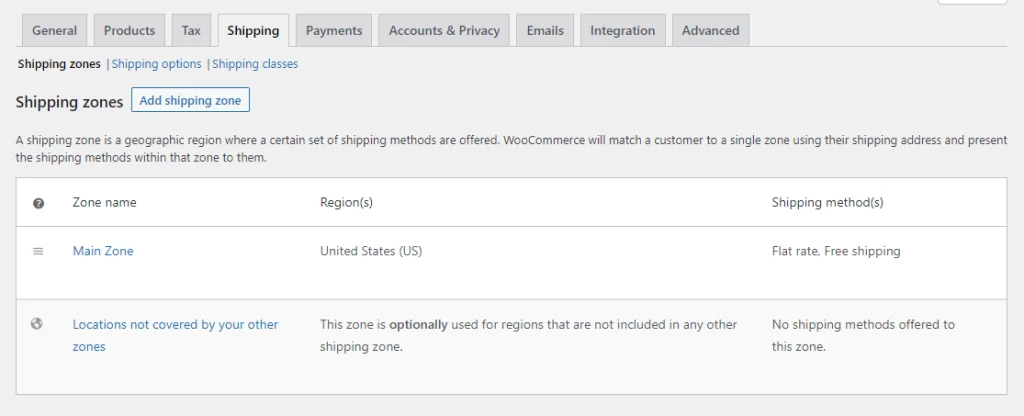
| – Product settings. – Security settings. – Payment and shipping options. – Email notification options. – Language options. – Tax options. |
You can set this up easily, as you have already dealt with these settings on Shopify. However, in WordPress, you will get more control over the store. If you need any additional features for your store, simply go to the dashboard and look for a suitable plugin.
WordPress has thousands of plugins that bring you solutions for every issue related to running the site. In this way, you can migrate your old Shopify store to WordPress and enjoy the extensive benefits this new platform brings you!
The Closing Lines
Following the above-narrated steps, you can migrate your Shopify store to WordPress by yourself. However, if you want to take any external help, that is also okay. After getting your store migrated, don’t forget to point the domain to WordPress and fix the permalink.
Besides, search engine optimization is essential to ensure your store makes sales. Once your store is set to focus on SEO for this, take guidance from this article- 8 WordPress Website Optimization Techniques.

